Working with Rasters In ArcPy
Today is About Rasters...
What is a raster?
In its simplest form, a raster consists of a matrix of cells (or pixels) organized into rows and columns (or a grid) where each cell contains a value representing information, such as temperature. Rasters are digital aerial photographs, imagery from satellites, digital pictures, or even scanned maps. - Esri
Raster are images to explain surfaces and geospatial data such as elevation in grid like images with pixels, coding certain pixels to certain metadata. We can color these pixels to classify the image with different features.
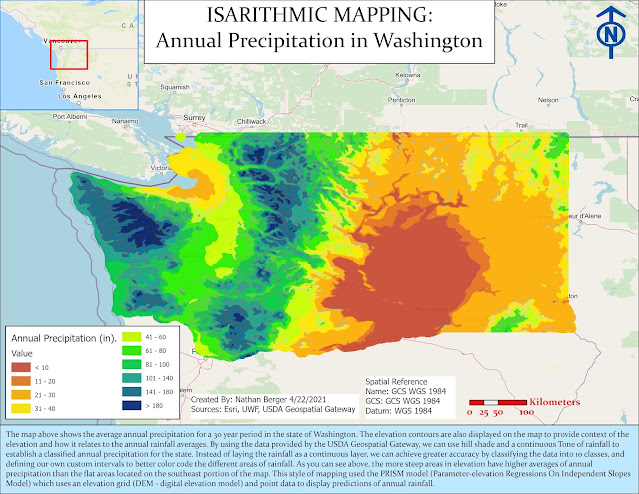
Rasters can be elevation files called DEM's (digital elevation models), they can be tiff files taken from satellite imagery which is a colored pixel shot of an area, or they can even be continuous images explaining geospatial phenomena such a rainfall or temperature.
Today we are going to demonstrate how using Arc GIS Pro, ArcPy, and GIS spatial analysis extension can automate workflows when analysis multiple raster files including elevation, landcover, reclassifying landcover, slope, aspect, and deriving a final raster file with specific parameters.
The projects parameters:
• Forest landcover (classifications 41, 42, and 43)
• Slope between 5° and 20°
• Aspect between 150° and 270°
The goal:
Create a raster output that identifies areas with a particular set of parameters: slope, aspect, and land cover type. We will be working with elevation data of an area, using landcover and mapping algebra to identify a particular raster with the above parameters. We need to reclassify our landcover to select the forests, calculate the slope, aspect, and combine all of these rasters together into one final raster in a new GDB.
Before we begin, refer to the flow chart below...
To start our script, we need to first import our modules for ArcPy and set up our workspace. We also need to import the spatial analyst extension in ArcPy. We must also over write our output to true.
We also want to list the rasters in our project to see what we are working with. You can use the ListRasters( ) function in a for loop to do this. Make sure to call the describe() function in the for loop as well so we can also see what format the rasters are saved in, their compression type, and their band count.
##rasters = List Rasters Function
for raster in rasters
print code
Something similar to the pseudo code above! Example of output below!
Now we can start crushing it!
First, we need to check in our Spatial Analyst extension .This will require an If statement, in which all of our code will fall in the If statement. Then at the end of the script, we will add an else: statement to close the if statement out. We only want this code to run if the spatial analyst extension is available to the project. If it is not, we will make sure our else returns a print statement saying that the extension is not available.
What is the Spatial Analyst Extension?
The ArcGIS Spatial Analyst extension provides a broad range of powerful spatial modeling and analysis capabilities. You can create, query, map, and analyze cell-based raster data; perform integrated raster/vector analysis; derive new information from existing data; query information across multiple data layers; and fully integrate cell-based raster data with traditional vector data sources. -Esri
What is the ArcPy module required for most raster tools?
The spatial analyst module (arcpy.sa) is required in ArcPy
to conduct the classification tools such as slope and aspect of rasters or
image files. We can import this module from ArcPy using the from arcpy.sa
import *. This module allows the use of spatial analysis functions where we can
provide analysis on raster files.
We can run a slope function for percent rise to test out the extension to make sure it is working:
Now we need to Reclassify the landcover raster to only show forested land. We need to set a remap value to 41, 42, and 43 of our range value and run the reclassify function onto our landcover raster. The original landcover raster is below...
This is the landcover reclassified raster with the coloring of the pixel cells altered for reclassification...
Now we will take the elevation image below and save it to a variable as a raster. We will convert it to feet from meters using map algebra, multiplying the elevation raster by 3.281
 |
| Elevation |
Now we will run the slope function and aspect function using the required parameters from the beginning of the project. We need a slope between 5 and 20, and a aspect between 150 and 270. We will run these functions and save them as variables.
 |
| Aspect Calculation |
The last and final step is to add all 5 of these rasters together! We will use the & operator which will add each individual raster together.
 |
| Final Output |


Comments
Post a Comment